What I am about to share is potentially highly dangerous knowledge.
I have always assumed that if a moment came when I wanted Danish pastry really really badly, it would probably be easier and faster to drive over to Denmark (which after all is just a bit more than a four hour drive from where we live) than to try making it in my own kitchen.
Many people are wary of yeasted pastry and even the most ardent home bakers use store-bought puff pastry. Danish pastry is those two combined: it’s both yeasted and laminated which makes making it at home seem like an act of masochistic madness. 

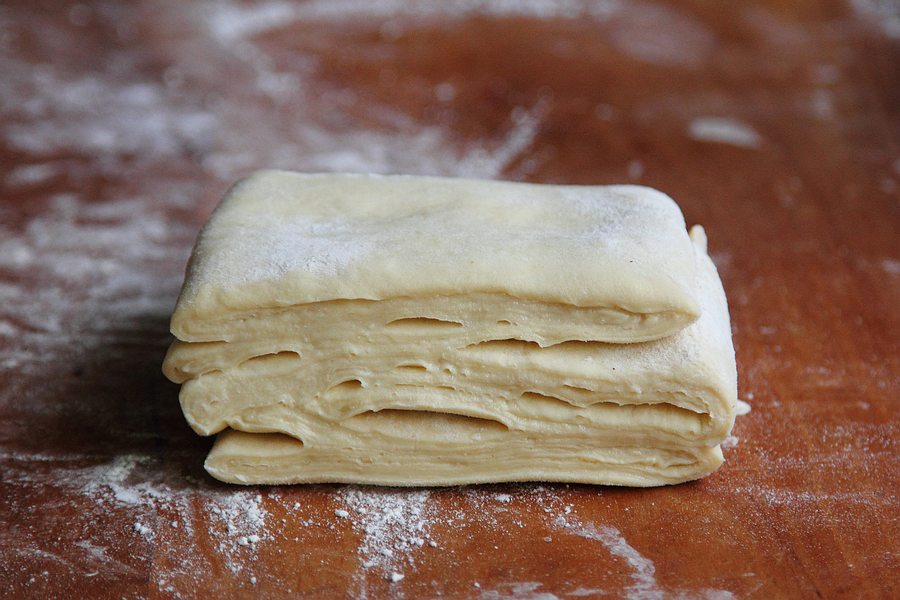
But people: I found out that there is a completely painless route to perfectly flaky Danish pastry that anyone with a food processor and a rolling-pin can take. Moreover, once you make the dough you can keep it in the fridge for up to 4 days and bake with it anytime you fancy a Danish pastry (in my case too often). It even becomes feasible to serve freshly baked Danish pastries for brunch without getting up in the middle of the night to start. Like I said: dangerous knowledge.


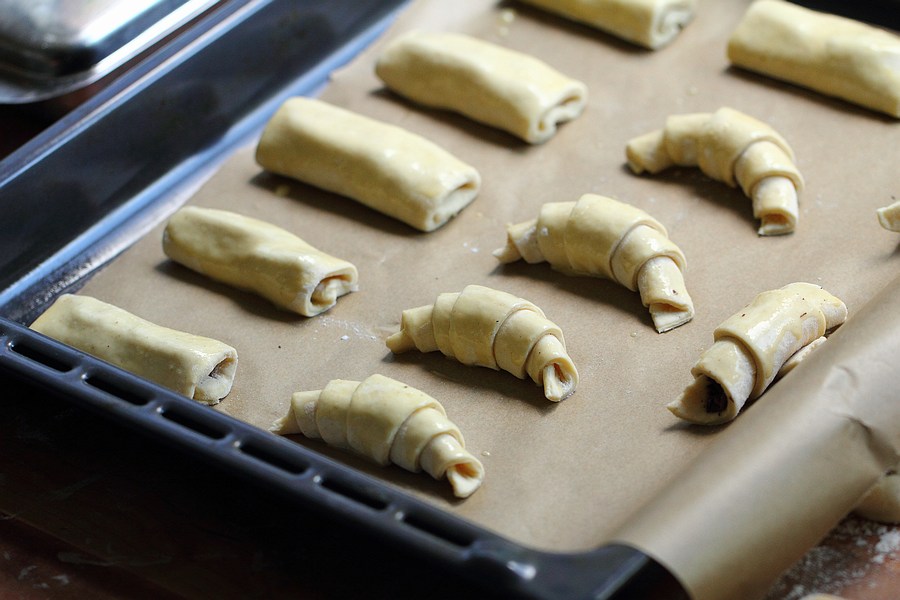
After I made the dough, I divided it in two, used one half to make a fabulous tarte tatin (recipe coming) and used the other half a couple of days later to make croissants and pain au chocolat on a whim. Before someone starts yelling at me for this: I know that croissants dough is different from Danish pastry (though not terribly much because both are yeasted laminated doughs). But believe me, these were much better and more authentic than any croissants I could buy within a 20 km radius at least. And they were so, so easy to make: I took the dough out of the fridge, rolled it out and shaped into croissants and let them rise while preheating the oven. Within an hour, I was on my bike cycling to my son’s school, with a picnic basket secured to my luggage carrier. He gets an hour lunch break and so we walked to a small lake in the neighborhood, sat on a bench, ate croissants and chatted happily in the autumn sun while watching a pair of fishermen set up their fishing gear. It was my happiest moment of the week.
Easy Danish pastry
Adapted from How to Be a Domestic Goddess: Baking and the Art of Comfort Cooking, who in turn adapted the recipe from Beatrice Ojakangas
60 ml (¼ cup) warm water
1 tbsp dry yeast
125 ml (½ cup) milk, at room temperature
1 large egg, at room temperature
300 g (2 ¼ cup) all-purpose flour
1 tsp salt
1 tbsp sugar
225 g (1 cup) butter, cold, cut into thin slices
In a large bowl, dissolve the yeast in the warm water. Add milk and egg, stir and set aside.
Put flour, sugar and salt in the large bowl of the food processor and give them a quick whizz to mix. Add the cold sliced butter and pulse about 8 times. You want the butter to be cut up a little but with visible chunks of at least 1 cm (½ inch). Empty the content of the food processor into the large bowl with the yeast mixture. Use a rubber spatula to gently fold the ingredients together, but don’t overmix. Cover the bowl with plastic and put in the fridge overnight (or up to 4 days).
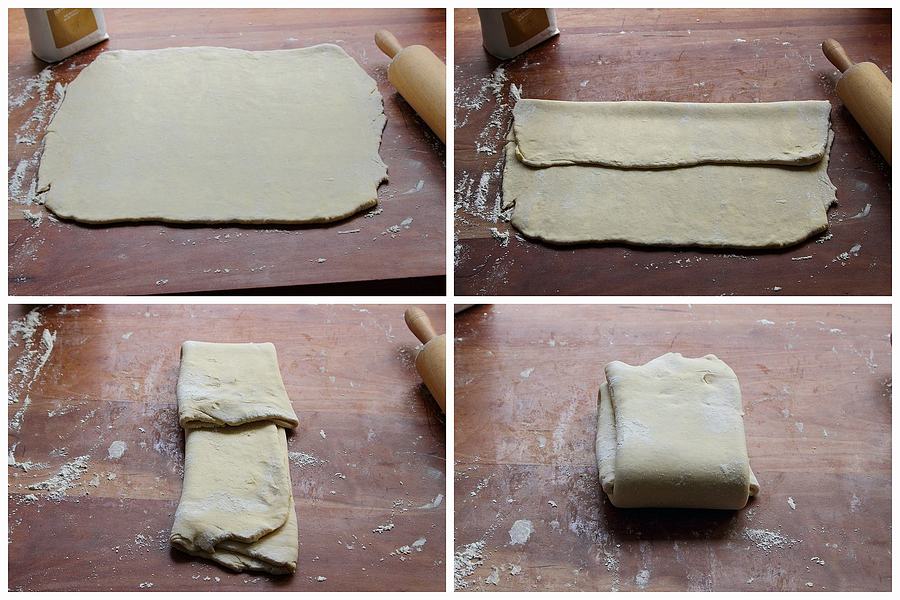
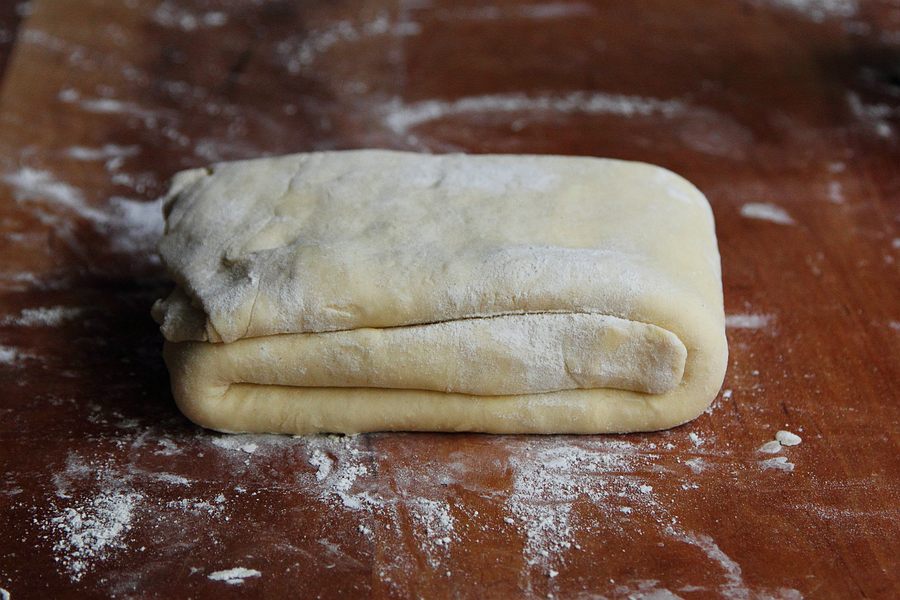
Next day, take the dough out of the fridge and turn it out on a well floured surface. Roll it out into a large roughly square shape dusting with flour to keep it from sticking. Fold the dough into thirds, like a business letter, then turn it so that the closed fold is on you left, like a spine of a book. Roll out again into a 50 cm (20 inch) square and repeat the above steps 2 times more. When you have folded the dough the third time, turn it again so that the fold is on your left and fold once more in thirds (see pictures above). Cut the dough in half and wrap both pieces in plastic. Refrigerate for at least 30 minutes (or up to 4 days) before using. You can also use one half immediately and freeze the other half.
5 comments for “Easy Danish pastry”